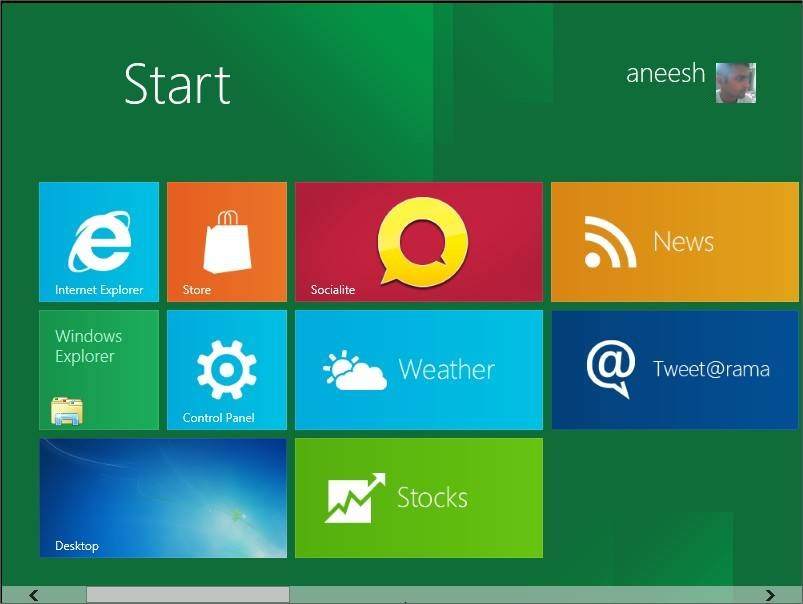
Microsoft recently showcased a consumer preview of their next biggest product, Windows 8. It is believed that Windows 8 is going to power a next wave of Tablet PCs, Desktops and other mobile computing with it’s touch-based Operating System. We are yet to see how much impact Windows 8 is going to make in the tech world. The Consumer Preview (CP) is a pre–release version of Windows 8 that mainly focuses on user experience and feedback. Please note that this preview may come with many vulnerabilities which are not discovered yet, and is not recommended to install this in a production environment, but only for testing and learning new features.
If you are curious to try out Windows 8 CP and do not want to destroy your existing PC, you can install Windows 8 on a Virtual machine (VM). VM is a completely isolated operating system witin your normal operating system. It’s like running another computer within your existing computer, much like how you would run a program like Microsoft Office. In this post, we are going to look at how we can install Windows 8 CP in a VMware Workstation developed by VMware, one of the global leaders in Virtualization technology.
Installing VMWare Workstation on Your Computer
Step 1: Go to VMware and download VMware Workstation 8 which can be found here. You can get a 30 days trial version of VMware 8 Workstation or buy the full version for US$ 199.
Note: I tried to install Windows 8 Consumer Preview on a VMWare 7.1.5 workstation, but it wasn’t successful. So it is better if you could use VMware 8.
Step 2: Installing the VMware Workstation is pretty easy, just follow the onscreen instructions.
Download and Install Windows 8 Consumer Preview
Step 1: Download a copy of Windows 8 CP ISO file from Microsoft website by clicking here. You need to choose the correct ISO file, for e.g. if your computer is a 64-bit (x64) system, you can get 64-bit copy here. If yours is a 32-bit (x32) system, download it from here. If you’re looking for languages other than English, choose your download from this location.
Step 2: Once the download is complete, we need to create a new Virtual Machine in VMware Workstation. To do that, run VMware Workstation, click on “Create a New Virtual Machine” from the screen or go to File >> New Virtual Machine.

Step 3: Select Typical and click Next
Step 4: Select Installer Disc Image File (iso) option and browse and locate the Windows 8 CP you just downloaded and click Next


Step 5: Select Microsoft Windows, then select Windows 7×64 from the drop down menu under Version. (assuming that you have a x64-bit computer. Click Next.
Step 6: Enter the Windows Product Key: NF32V-Q9P3W-7DR7Y-JGWRW-JFCK8 (This is the key provided by Microsoft for CP) and Full name and password (optional) and click Next. You can change the name of the Virtual Machine and also provide a new location if you want to in the next page, or leave the default entries as it is.


Step 7: Specify the Maximum disk size for this new virtual machine. I’ve choosen 40GB and then select either to store the disk as a single file or on multiple files and click Next.

Step 8 (Optional): Select “Customize Hardware” if you would like to change any hardware configuration. The basic system requirement for Windows 8 CP recommends to use minimum 1GB RAM. I’m using 1.5GB for this test.
Step 9: Click on Floppy and change the settings from “Use floppy image file” to “Auto detect” or you may untick the “Connected” and “Connect at power on” options to completely remove Floppy. This is done because, there is a known error (screenshot below) if we leave VMware to use floppy image file.

Step 10: Click Close >> Select “Power on this virtual machine after creation” >> Click Finish.
Step 11: Select the language, time and currency format, keyboard or input method as required and click Next.
Step 12: Click Install. Windows 8 CP will now be installed on your new virtual machine.


Solving “Windows cannot read the <ProductKey> setting from the unattend answer file.” Issue
I’ve mentioned this in the Step 9, but if you’ve missed out that step and get this error message, follow the steps below to correct it.
Step 1: Power down the virtual machine by Right clicking on the newly created virtual machine >> Power >> Power Off.
Step 2: Right click again on the same virtual machine and click Settings >> Select Floppy >> Select “Use physical drive” as “Auto detect” or completely disconnect the floppy.


Step 3: Power on the virtual machine again.
Enjoy using Windows 8 Consumer Preview! You can give your feedback to Windows by participating in their Windows 8 Consumer Preview Forum here.
Do you find this information useful? Share it with your friends by on Facebook, Google+, Twitter or other Social Media. You can also follow me on Twitter @sarayoo.info or Google+ or Like me on my Facebook or on my LinkedIn for more updates, technology tips and tricks, iPhone, iPad, other iOS devices tips, iOS App Deals, Blogging tips, etc. Please leave your comments in the comment section or contact me if you have any other questions.
